If you have celiac disease, have gone gluten free and still feel sick I think you should try putting yourself on the GAPS diet or SCD diet. It is temporary and helps heal the gut. The leaky gut syndrome is caused by the food leaking out of the holes in your intestines (caused by celiac spur) and going into your blood supply. You may have these holes. I am not sure, but this may be worth a shot and it is all natural approach without pills. Sounds great to me.
Since I am baking Gluten Free foods now due to having a celiac in the family I just can't get over the disgusting taste of Xanthum gum. I know in most recipes it is such a minimal amount of xanthum gum used, but I hate it and it makes my stomach feel weird. The more I read about xanthum gum the more I feel uneasy about it. The fact is mostly like the xanthum gum is being created from some form of High Fructose Corn Syrup. I am not ok with that! We do not eat HFC and even my 6 year old goes around telling people we don't eat high fructose corn syrup :)
Isn't it amazing something that is wonderful for cooking can also be a lotion/moisturizer? Checkout this super simple recipe to make your own coconut oil moisturizer http://thecoconutmama.com/2012/11/diy-coconut-oil-moisturizer/
In 90 seconds, a stand mixer can break 1 cup (about .25 L) of cream down into the butter and buttermilk stage.
Like a lot of people, the first time I made butter, it was an accident. I was whipping some cream and got distracted. I got back just in time to see the whipped cream separate into butter and buttermilk. (Hmmmm... I don't think that ever happened with the powered whip cream mix Mom bought.- I love you Mom, but you know - you and cooking = Pellegrino and Crisco.)
I was bummed that I screwed up the whip cream, but It was still really cool how it became butter in just seconds. So I started making butter at home and I'd thought I'd show you how I do it.
I always find that these kinds of things are a lot easier, and less intimidating, if you can watch someone do it. So watch the video and you can see me make butter, start to finish, in real time, with no editing. It's not as messy as it looks in the video - unless you are making a video of yourself doing it.
In the video I use 2 cups (a little less than .5 L) of cream so it takes twice as long. You will see the cream break down at about 3 minutes. Because I didn't use the splash guard, I also couldn't run the mixer at full speed.
With washing, it only takes a little over 9 minutes to go from 100% Heavy Cream to finished homemade butter. That's probably faster than it would take Usain Bolt to run to the corner store, buy a pound of butter (with free Mono and Diglycerides, Polysorbate 80 and Carrageenan) and run back home.
These are the ingredients. Manufacturing Cream (or Heavy Cream) Sea Salt (optional)
These are the tools I used: Kitchen Aid Stand Mixer Wire whisk attachment Beater attachment Splash guard - Omitted in video - you'll see why it's important (ew, i think there is butter in my hair, yummm, yep it's butter.) Ice water Spatula Parchment paper or Plastic wrap
Step 1How to do it
How to do it.
When I went to buy cream at Smart and Final (restaurant supply that is open to the public) I saw "Manufacturing Cream". I didn't know what it was, but it was a little higher in fat than Heavy Cream. It was only pasteurized, not ultra-pasteurized, and the only ingredient in it was "Heavy Cream".
I bought a 2 quart (1.89 L) carton for $7.
I researched it and found out "Manufacturing Cream" is the cream restaurants and bakeries use for baking and cooking (the names of types of milk/cream are different all over - even from state to state. I'm in California.) It does not have all the additives like Ultra-Pasteurized Cream. The flavor is very good. It doesn't last as long as regular ultra-pasteurized heavy cream though.
In the video I'm using 2 cups of cream. I went ahead and weighed the cream, and then the finished butter, so you could see how much butter I got out of it.
Before: 2 Cups (a little less than .5 L) Cream = 1 lbs = 16 ounces = 450g After: Butter: 7 ounces = 198g Total cost was $1.75 (sorry, don't know how many €'s, or £'s, or Can$'s or Aus$'s, or ¥'s, etc. that is)
Almost half of the cream was butter.
You want the cream to be between 61°F (16°C) and 65°F (18°C) to get it to separate fast.
I usually do 1 cup (about .25 L) of cream at a time, and it takes about 90 seconds to separate.
I put the cream in the mixer with the wire whisk. If you have a splash guard - USE IT. I left it off in the video so you could see what was happening. The camera, my kitchen, and I, all got splattered with buttery goodness.
It will whip into whip cream, and right after it gets to firm peaks, it will start to separate. SLOW the mixer down, or it will make a mess and splash all over the place - even with the splash guard. Just let it run another 5-10 seconds.
Then switch to the beater blade. If you stay with the whisk, the butter clumps up inside the whisk and is very hard to get out.
Beat the butter on a slow speed for about 10 seconds to let it finish separating. Using a spatula, squish the butter into a lump in the bowl, then pour the buttermilk off. You can use this buttermilk for baking. Some people like to drink it.
Now wash the butter to get all the buttermilk out. If you leave buttermilk in your butter it won't last nearly as long. If you are the kind of folks who like to leave butter out at room temperature, you might find that it has gone rancid if you leave any buttermilk in it.
Add some ice water to the bowl and beat it on low for around 10 seconds.
Use your spatula to squish the butter into a lump again then pour the water off.
Keep repeating the rinse process until you get clear water.
I do the last wash by hand. Pour in some ice water and squish the butter around to see if you can get any more milk.
Pour that water out. Squish the butter around some more to squeeze out any water that is in the butter. We don't want to leave any water suspended in the butter. Keep squishing it and pouring off any water you get until you don't get any more water - about 3 times for me.
That's it. You have butter.
If you like whipped butter, you can just put it back on the mixer and beat it on high, for a minute or two. If I want salted butter, I put some sea salt in while it is whipping. About a 1/4-1/3 tsp per cup of cream.
Whipped butter spreads easier and melts faster. If you use whipped butter for baking - you cannot measure it by volume. You can only measure it by weight. Because we whipped air into it - 1/4 cup of regular butter will be about 1/3rd cup of whipped butter (depending on how much air you whip into it). You smart Europeans, who bake by weight already, need not worry.
So excited to find this blog tonight!!! So many wonderful ideas to help kids eat healthy. I know my little 5 year old will come home from school and want to grab something to eat quickly. I do not want him running for fruit snacks with High Fructose Corn Syrup or potato chips. This blog Keeper of The Home as some great quick ideas for healthy snacks.
Forget about the sugary candy corn and caramel-covered apples — these muffins are one of my favorite healthy fall treats. Whip up a batch of these over the weekend, then freeze a bunch to eat sporadically over the next few weeks. Adding a new breakfast item into your weekly meals is a great way to start a new season. And remember, to get more nutritional bang for your calorie buck, you can substitute whole-wheat flour for all-purpose flour — and if you can find it, organic raw honey is your best bet. Enjoy waking your taste buds up to fall with these muffins!
Harvest Pumpkin Muffins
Ingredients
1 1/2 cups all-purpose flour
1 1/2 teaspoons baking powder
1 teaspoon baking soda
1/4 teaspoon salt
1 1/2 teaspoons ground cinnamon
1/2 teaspoon ground ginger
1/4 teaspoon ground nutmeg
1/4 cup butter, softened
3/4 cup honey
1 egg
1 cup pumpkin, packed solidly
1 cup chopped walnuts, toasted
Preparation
In medium bowl, combine flour, baking powder, baking soda, salt, cinnamon, ginger and nutmeg; set aside.
Using an electric mixer, beat butter until light; beat in honey, egg and pumpkin. Gradually add flour mixture, mixing until just blended; stir in walnuts.
Spoon into 12 greased or paper-lined 2-1/2 inch muffin cups. Bake at 350°F for 25 to 30 minutes, or until toothpick inserted in center comes out clean. Remove muffins from pan to wire rack. Serve warm or at room temperature.
Makes 12 servings
Prep Time: 15 mins Cook Time: 30 mins Total Time: 45 mins
Nutrition Facts Number of Servings: 12 Amount Per Serving Calories: 226 Total Fat: 10 g Cholesterol: 10 mg Sodium: 251 mg Total Carbohydrate: 32 g Dietary Fiber: 2 g Protein: 5 g
Back to school is hard. And the end of summer is even harder.
So when the two collide in a how-can-it-be-over-I-want-summer-back flurry of a.m. activity because nobody is back on an appropriate school time sleep schedule, breakfast takes a back seat for too many school-bound families.
In my search to find some new breakfast routines that don’t include commercial, big-brand sugar cereals with way too loud of packaging for the early hour, I find myself gravitating to a go-to favorite breakfast my husband introduced to me just a few years ago. How in the world did I survive my adolescence without this breakfast?
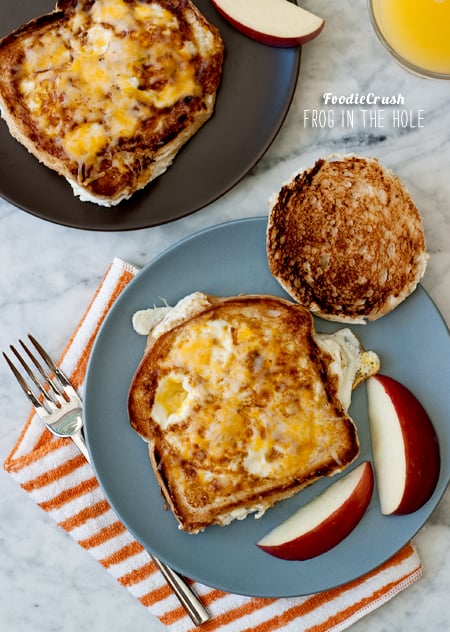
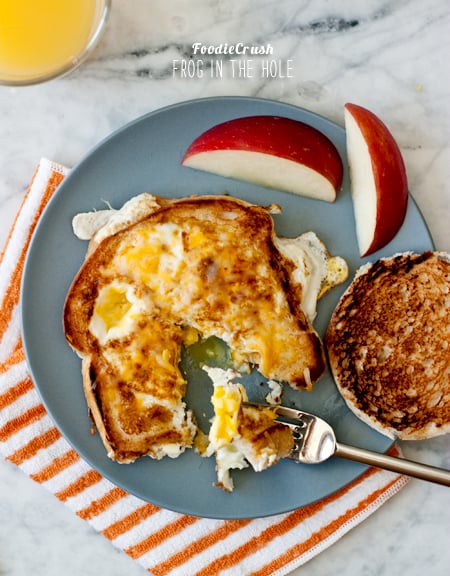
Frog In the hole. Yup, that’s the name, don’t wear it out.
Odd name it may be, but easy it most definitely is. By choosing a whole grain bread that provides a long-wearing carbo load, protein packed eggs and the finish of cheese just because, and a bit of fresh fruit, it’s a healthy, power-packed breakfast that’ll keep my 7-year-old’s brain churning ’til lunch.
Frog In the Hole
serves one
1 slice whole wheat bread (I like my local brand Grandma’s Sprouted Wheat)
2 eggs
1 tsp butter
1-2 T shredded cheese
Heat a fry pan on medium and spray with cooking spray and 1 tsp of butter. With the rim of a water glass or biscuit cutter, cut out the center of a slice of whole wheat bread. Place bread slice and remaining round in fry pan and crack 2 eggs in center of holed-out bread. Place a lid over the pan and cook for 2 minutes or so. As eggs set and whites become cooked, flip bread and egg with turner, also turning bread round. Add shredded cheese to top of egg and bread, cover to cook and melt until eggs are cooked as desired. Serve with fresh fruit. For the adults, I serve with Chohula or salsa and sour cream for a little kick.
Need a few more ideas for make ahead or easy a.m. recipes? These will get you through the morning and are as easy as putting on a fresh cup of joe.
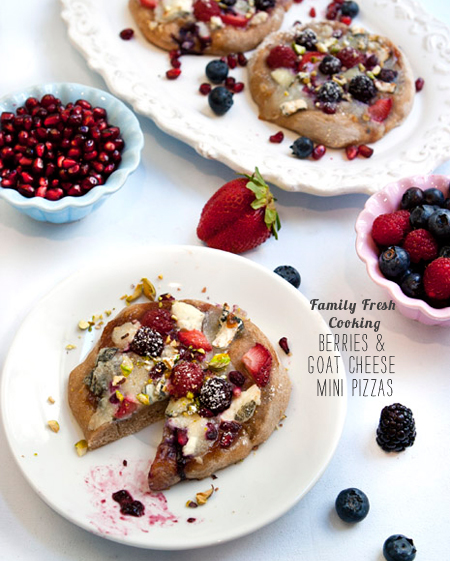
Entice the kids with Family Fresh Cooking‘s sweet Berries and Goat Cheese Mini Pizza, a recipe that brainwashes the young-uns into thinking they’re eating dessert for breakfast. Pick up a pre-made pizza dough (Marla likes Trader Joe’s Pizza Dough) then go with a mild goat cheese—or a more potent flavor if your kids aren’t picky—and choose your own fruit and nut combo to keep them happy.
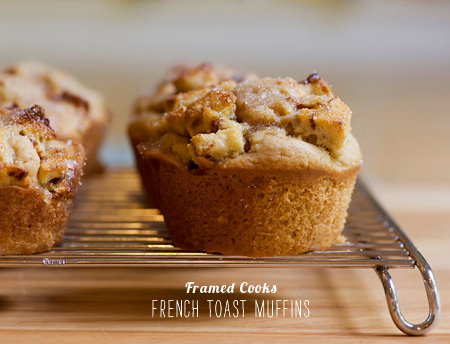
Simplify your morning but still get mom (and dad) star points? Yes! Thanks to Framed Cooks maple-ey on-the-go version of the good old stand-by French Toast, Kate’s French Toast Muffins are perfect to make the night before and toss to the kids as they sprint out the door.
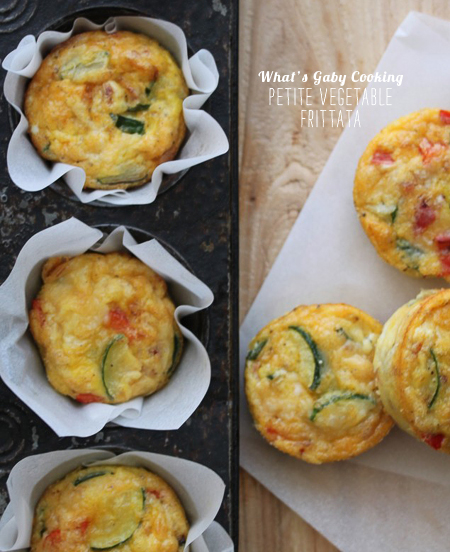
Clear out the veggie crisper and bake ahead the night before so that the next morning you’re ready to warm upWhat’s Gaby Cooking‘s Petite Vegetable Frittatas in the microwave for a minute and toss to the kids as they bolt out of the door. This recipe would also be great in a ham and cheddar cheese variety for a meat lovers option.
Cook ground turkey breast and onion in a hot skillet; spread hummus on tortilla; add meat, lettuce, onions and tomatoes. Wrap your tortilla. Enjoy!
Nutritional information (per serving) Calories 250 Total fat 6 grams Saturated fat 1 gram Cholesterol 40 milligrams Sodium 340 milligrams Total carbohydrates 30 grams Fiber 4 grams Sugars 3 grams Protein 17 grams
ALI VINCENT'S MANGO QUINOA SALAD
Makes 6 servings
2 cups cooked red quinoa (at room temperature or cold) 1 diced mango 1 handful chopped cilantro 1 15-ounce can black beans 1 red bell pepper, chopped 6 green onions, thinly sliced 4 Tablespoons red wine vinegar 3 Tablespoons olive oil 1 Tablespoon fresh lime juice
In a small bowl, combine vinegar, oil and lime juice. Combine everything else in a big bowl. Drizzle liquid mixture over the salad, and toss until well combined. Chill for about an hour.
Nutritional information (per serving) Calories 240 Total Fat 8 grams Saturated fat 1 gram Cholesterol 0 milligrams Sodium 10 milligrams Total carbohydrates 34 grams Fiber 7 grams Sugars 9 grams Protein 7 grams
Doctor Oz had a cool segment on his show about five dollar healthy meal challenge. Here are the recipes that came in the top 2:
CHICKEN ROLL-UPS
This dish combines multiple food groups in a healthy way. It’s also easy to tailor to be a Greek, Italian or Asian-style dish by mixing up the ingredients. At less than $5 for the whole meal, there’s no reason not to get rolling on this delicious dinner.
1/4 of extra virgin olive oil (or 1/4 cup of fat-free mayo)
3/4 cup of bread crumbs or 1 cup whole grain cereal flakes grinded in mini food processor
Directions
Preheat oven to 350°F. Lay cutlets on saran wrap, cut into long pieces and pound until thin. Fold ham and cheese and half and lay over the chicken. You can add to taste sliced garlic, basil, rosemary and vegetables like tomato or asparagus before rolling.)
Start at the narrowest end of cutlet and the roll up. Secure with a toothpick or be sure to lay them seam side down once breaded.
Dip pastry brush in extra virgin olive oil and brush on chicken rolls. Quickly put the entire chicken roll into bowl of bread crumb and use your hand or a spoon to press crumbs firmly onto chicken roll.
Transfer the rolled cutlets to a baking dish. Then, using a teaspoon, drizzle some extra virgin olive oil over each chicken roll. (If on hand, pour a little white wine in dish to cook with chicken and then spoon on when finished) Bake for 15 - 20 minutes in the middle of the oven. In the last few minutes switch your oven to "broil" and move your baking dish to the rack closest to heating element. In 1-2 minutes, the high heat will brown up the crumbs. Remove from oven and enjoy!
Recipe courtesy of Elizabeth Rekowicz.
CHICKEN CUTLETS AND SAUTÉED KALE
Healthy eating doesn’t have to break the bank. This dinner costs under $5 per serving, and is only around 350 calories. Instead of eggs, this recipe uses skim milk – a cheaper and healthier alternative.
2 heads of dinosaur kale, stems and ribs removed, leaves chopped
1/3 oz garlic powder
1 lemon
4 oz skim milk
5 cloves of garlic
Olive Oil
Parmesan cheese, freshly grated
Salt and pepper
Directions
Dip chicken in skim milk and then coat with bread crumbs combined with a bit of grated parmesan cheese. Bake chicken at 350°F for 20 minutes. When you turn the chicken over add lemon juice over top of each piece. Put on plate and keep warm.
In another pan, heat olive oil and sauté the 5 whole cloves until lightly browned. Add washed kale to pan, sprinkle with salt and pepper and sauté for 10 to 15 minutes. Serve along side of chicken.


 11:11 PM
 j cubed

 Posted in: